Showing posts with label diy. Show all posts

Thursday, June 14

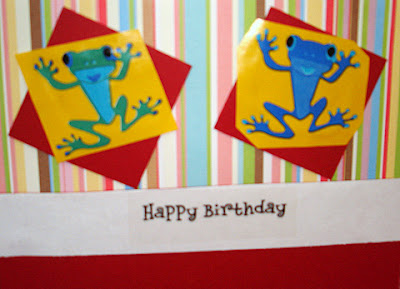
hoppy birthday


I made this card for little man, thought "hoppy birthday" would be most appropriate for the title, lol.

For more birthday cards checkout my paper goods shop miss tenacious :)

Friday, May 18

make your cookies pretty!

These cookie cutters are fabulous! The 8 piece set includes the silhouettes of a dress, skirt, blouse, hat, tiara, shoe, purse and sunglasses. They come in a cute metal “lunch box” with handle. $35 {CAD} for the set, you can buy them here.

[image Williams-Sonoma]

Friday, April 13

sarah's got a new show

the den/home office
the bathroom
the guest room
the kid's room

"...ever dream of buying a house, gutting it, and re-building, so it is perfectly you? Well I'm doing just that. I bought a house, renovating it room by room, making the most of every dollar. It's tough work but stick with me. I'll show you how to get the home you want." — Sarah Richardson

Sarah Richardson has a new series: Sarah's House on HGTV. She bought a real "fixer-upper" {aka a dog's breakfast} and is renovating it. She is so creative, and always designs a living space that is beautiful and works. Lots of inspiring ideas from Sarah, don't miss it! Show is on Tuesdays at 9pm et.

[images from HGTV]

Wednesday, April 4

craft corner - easter egg critters


These are too cute! HGTV has such fun crafts for the whole family. Here is the tutorial to make the bird shown above:

Materials

1 hardboiled egg
Tissue paper
Craft glue
Paint brush
Small plastic container
Black marker
Coloured construction paper

Directions

1. Squeeze a small amount of glue into the plastic container and add a teaspoon or two of water. Mix together well
with your brush.

2. Take your tissue paper and rip into little pieces. Then brush a small section of the egg with glue and place the tissue paper on top.

3. Work your way around the egg, overlapping the tissue paper as you go along. Once you place a piece of paperdown, dip your brush into the water and glue mixture and brush on top.

4. Leave an oval shaped space on the egg free of tissue paper for the birds tummy.

5. Place the egg flat on the portion not covered in tissue paper and allow to dry (approx. 20 minutes).

6. While the bird is drying, make the wings. Layer a few sheets of tissue paper on top of each other and trace out the shape of a wing. Cut along this shape and once the bird dries, glue the wings into place

7. To make the eyes, simply use your black marker to make 2 small circles in the front of the egg. Use your coloured construction paper to cut a small triangle for the beak and two hearts to attach to the bottom as feet.

Make the rest of the critters here.

[image + tutorial from HGTV]

Sunday, February 11

DIY SHOE DRYING RACKS


Hang these DIY shoe drying racks on the back of a door to save space, or on your laundry wall. They work well for hanging anything really. The project is found on the Rockport site from House and Home.

[image from Rockport]